PRINTMAKING TECHNIQUES IV.

Linocut
No wonder using Linoleum as the ground for printmaking is a popular technique – it’s relatively cheap and easy method, compared to etching and lithography. It is widely available and pretty much doable without a printing studio.

Picasso

Picasso
The History of Linocut
Linocut is a type of relief printing technique, that’s predecessors were wood and metal plate cutting. Linoleum was invented in the 1800s, for its common purpose of covering floors. By the 1860s it had its name, then gained its popularity in the 1900s when artists like Henri Matisse and Pablo Picasso began using it to create images.
It was also used in Germany to create wallpaper patterns, as well as a cheap option for practising in printmaking schools.
What materials do you need for making linocuts?
- Carving tools with different blades

- Printing Ink
- Printmaking paper – light weight, for example Stonehenge, Rives BSK, Japanese washi paper
- Lino Blocks
or just get a complete linocut kit
How Can You Make a Linocut?
- When you decided on an image, either transfer or draw it directly onto the linoleum block.
Keep in mind that your design will be printed reversed! - Start carving the linoleum – what you carve out isn’t going to be printed.
- Ink your linoleum block evenly with your roller
- Start printing! Lay your paper carefully onto the block, and press them together with the help of a baren or wooden spoon.
- Take off the paper, and reveal your print!
Multicoloured Prints – The Reduction Method
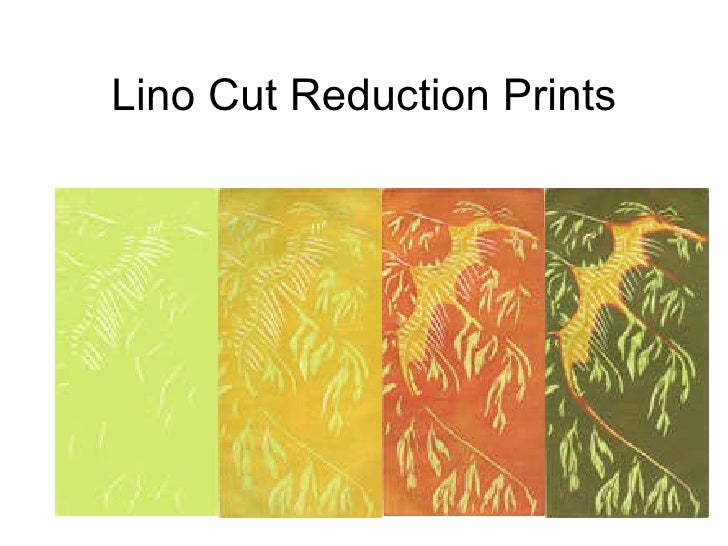
In order to create multiple colour images, the simplest way is to use the reduction method. That is, when you print different colours onto one image, using only one linoblock.
First you need to decide how many pieces you want in this particular edition. As you will be carving away more and more of the lino, you can only make a certain number of prints. When you’re done with the first layer, carve out more details and print each paper with the new colour. You can do this as much as you prefer, until you’re done. You can also experiment with printing different designs on the same paper.
video demonstration:
Useful Linocut Tips:
Heating the linoleum block makes it easier to cut.
- Draw the reversed image onto the linoleum
- Use carbon or tracing paper to transfer your image.
- Paint a light layer of acrylic on your drawn image to make sure it stays on during the carving process.
- If you made a mistake, try gluing back the cut out part, or fill the gap with epoxy resin.
Linocut by Bill Fick
REFERENCES
http://www.boardingallrows.com/linocut-process/
https://shellielewis.wordpress.com/2011/11/07/12503975764/
https://www.artfinder.com/blog/post/inside-the-art-of-linocut-printmaking/
http://www.accessart.org.uk/pdfs/printmaking.pdf
http://www.artistsandillustrators.co.uk/how-to/printmaking/222/top-tips-for-linocut-printmaking
http://greatnorthartshow.co.uk/the-history-and-process-of-linocut-print-from-paupers-to-picasso/


