PRINTMAKING TECHNIQUES II

More Printmaking Techniques: Lithography
A very interesting and versatile way to make multiple prints of drawings and painting-like images. Lithography is also responsible for the well-known Moulin Rouge posters, and the decorative advertisements of Alphonse Mucha, or the haunting images of Edvard Munch.
While lithography might not be the easiest method of printmaking, people do make versions of it for those who don’t have a proper printmaking workshop at hand.
What is the meaning behind Lithography?
The word lithography means “writing with stone” in Greek, which refers to the process of printing with a flat stone surface. (In other words called planographic technique as the printing image is on the same level as the non-printing surface.) Essentially, lithography uses a greasy substance to reach water-repellence and adherence at the same time, making it a great technique for multiplying detailed drawings and sensitive tone effects.
Lets look at the history of lithography
The German born Alois Senefelder (1771-1834) invented the technique that now we know as lithography in the 1790s. He was an actor and playwright who wanted to get more profit by reproducing his texts – which made him interested in the development of a suitable printmaking process. Since copper plates that they used for printing were too expensive to make mistakes with creating the reversed image, he decided to experiment with cheaper Bavarian limestone.
The process he discovered through his experimentation was the following: he used the fluid to correct mistakes in the drawing, which also happened to provide a water resistant surface, which then could be drawn on with oil-based ink.
Senefelder also discovered the method to transfer images onto the stone, thus making it possible to create prints with the image on the right side up.
After Senefelder’s publication of A Complete Course of Lithography the process became popular, and the new endeavour was to begin creating coloured lithograph prints. The first attempts achieved watercolour like tones by using one or two colours. For detailed colouration, artist still had to do this by hand after printing. Chromolithography became more widely used and cheaper by the 1880s, as printing presses became steam-operated, allowing lithograph prints to be used for magazines and advertising posters.
The Method
1.
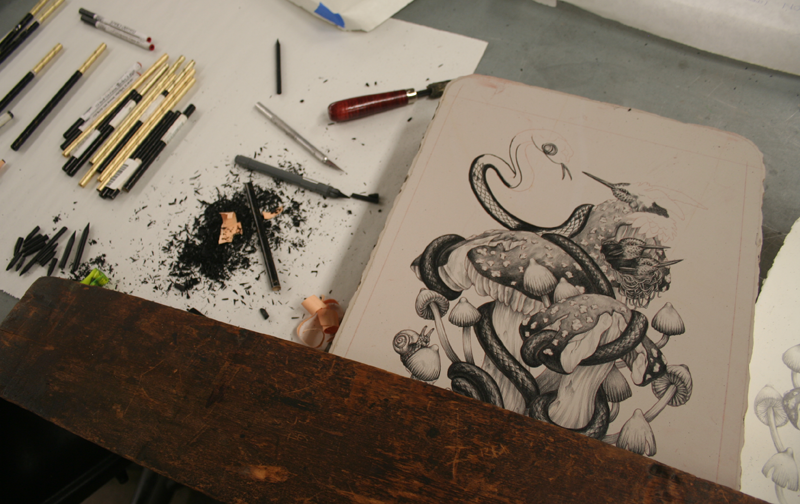
Drawing tools that can be used for drawing on stone slates should include grease, such as lithographic crayons, rubbing blocks, tusche (grease and water).
After the drawing is finished, the image should be dusted with french chalk for protection.
2.
After the drawing is done, the stone has to be processed, which method depends on the drawing materials and grease already on the stone. The image on the slate is fixed with the use of the etch, which is a mixture of gum arabic and nitric acid. This material is responsible for the creation of a water receptive (hydrophilic) and water repellent (hydrophobic) area; thus the non-image area remains clear while the image will become receptive to ink.
This process has to be repeated. The first layer has to be applied carefully with clean tools, then thinned down with a sponge before drying the gum. After leaving the stone covered for a night before applying the second layer.
3.
The next step is to remove the drawing materials from the stone with the use of plain gum arabic and then turpentine. The excess and the gum arabic should be wiped off with a damp cloth, leaving the stone only slightly wet.
After that non-drying ink should be applied with a roller, until the image is fully visible. (The stone should be kept damp during this process.)
The image is then dusted with french chalk, and the second etch can be applied. After the stone is dry, it can be printed after a few hours.
4.
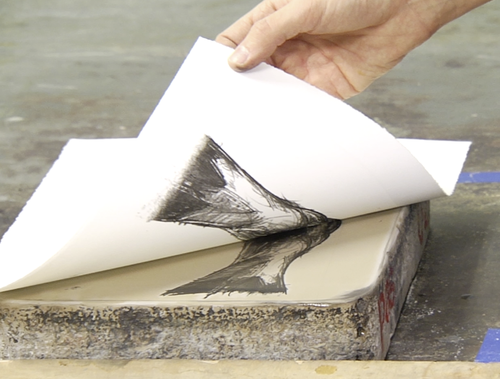
Greasy printing ink is applied onto the damp surface with nap or glazed roller. Usually the first few prints aren’t good representations of the image, as the slate needs to go through multiple inking processes. For the well-inked plate, pre-damped paper should be used for the prints.
5.
After the printing is finished, the stone has to be cleaned off before new images can be drawn onto the surface. It is done by graining the stone, a process that removes the grease from the surface, and exposes the new, chemical-free stone.
Oil patch cleanser is applied onto the stone and has to remain on for half an hour. After that it is scrubbed off with a scourer. Carborundum grit is applied three times (coarse, medium and fine) on the wet slate, each time washed off with Vim with a small piece of litho stone.
A very good demonstration of lithography by The Museum of Modern Art, New York: https://www.youtube.com/watch?v=nUXDltQfqSA
Some Videos:
Kitchen Lithography Demo
Printmaking using Plaster of Paris — No press or paper required!
Stone Lithography at Edinburgh Printmakers
Minneapolis Institute of Art, Printmaking Processes: Lithography
References:
http://www.tate.org.uk/learn/online-resources/glossary/l/lithography
http://www.visual-arts-cork.com/printmaking/lithography.htm
https://www.khanacademy.org/partner-content/moma/moma-printmaking/v/moma-lithography-process
http://www.leicesterprintworkshop.com/printmaking/a_brief_history_of_stone_lithography/
http://www.leicesterprintworkshop.com/printmaking/step_by_step_guide_to_stone_lithography/
http://www.lib.udel.edu/ud/spec/exhibits/color/lithogr.htm


![Frank Stella [title not known] 1967 Lithograph on paper](https://www.tate.org.uk/art/images/work/P/P78/P78387_9.jpg)