Making Acrylic Pour


Create Amazing Patterns with Flowing Acrylic Paint
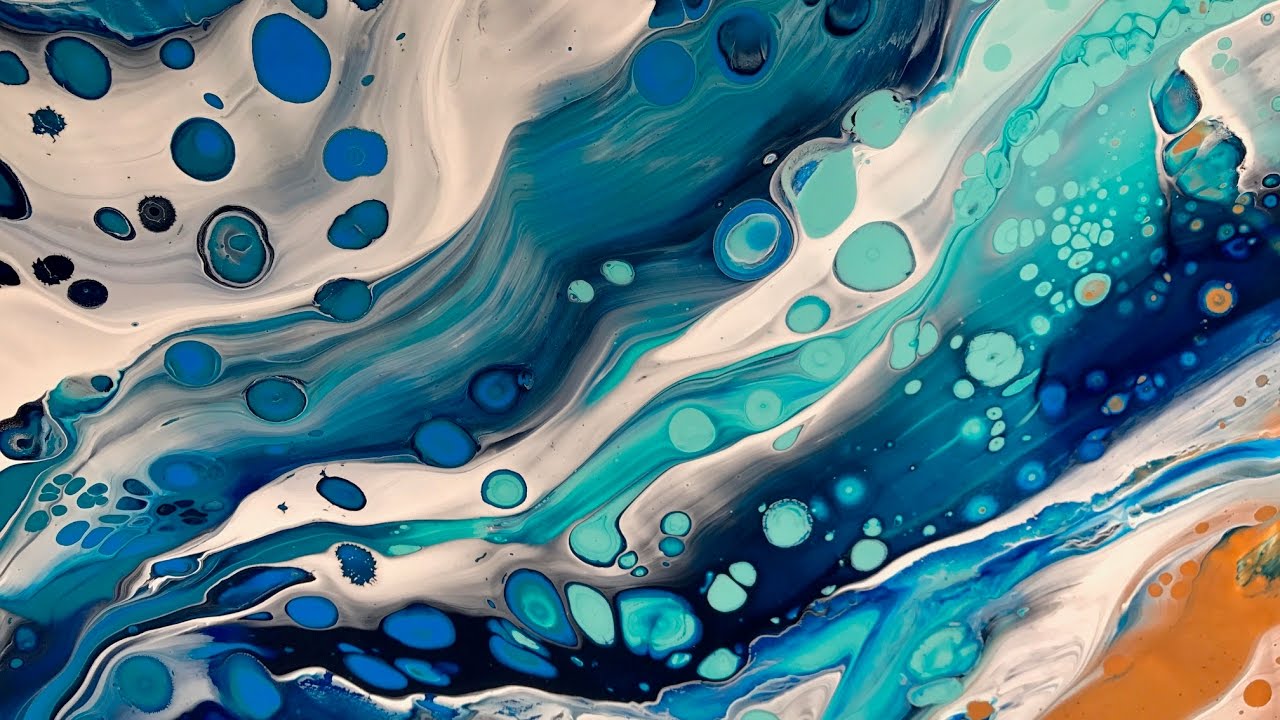
Acrylic pour painting is one of the top techniques under the title of “satisfying” and “calming” art. And no wonder it’s so popular; from Youtube stars to professional artist, everyone finds it a good fun. It’s especially a good technique for those who never painted before, those who are afraid of the blank canvas or those who’d just like to have fun with this messy but amusing technique. Read on to learn different methods you can explore your inner abstract artist!
What is Acrylic Pouring?
Acrylic pouring is a painting technique where the paint is mixes with a medium and then poured onto a surface in different ways. Sometimes individual colours are poured onto the surface separately, sometimes one cup is filled with different colours and poured at the same time. You can try many different things, the results will always be incredible and unique!
What do you need for acrylic pouring?
Acrylic Paint
The best type of acrylic paint for this technique is called Liquid or Soft-body Acrylics. For example:
https://iartsupplies.co.uk/sennelier-abstract-acrylic-paint-titanium-white-120-ml-bag.html
What Is a Pouring Medium?
Pouring medium not only helps the flow of the paint, it keeps the colour separate so they don’t combine in the pouring cup. It also extends the paint do as to prevent cracking.
We recommend using GOLDEN’s Acrylic flow medium. It’s a 100% acrylic polymer emulsion that can be used to extend acrylic colours, regulate transparency, create glazes, increase gloss, reduce viscosity and improve adhesion.
Find out more and link to buy >>


Other Supplies:
-
Pouring medium
-
papercups
-
measuring cups
Different Pouring Techniques
(click on the photo for video demonstration)

- Puddle Pour
Puddle pour mean when each colour is individually poured one after the other.
Mix each colour separately with the pouring medium and water. Ratio: 1:1:<1.
(You can also add a couple of silicone oil drops to help cell formation.)
Pour each individual colour after the other onto the centre of the painting, then move the ground back and forth until the paint is completely spread or you achieve the desired effect.

- Dirty Pour
This is an easy acrylic pouring technique in which all colours are poured into the same container and then poured onto the painting surface.
Mix each colour separately with the pouring medium and water. Ratio: 1:1:<1.
(You can also add a couple of silicone oil drops to help cell formation.)
The colour mixtures are poured into a new container in layers. Then, this mixture is poured over the painting surface. Move the surface back and forth until the paint covers it evenly.

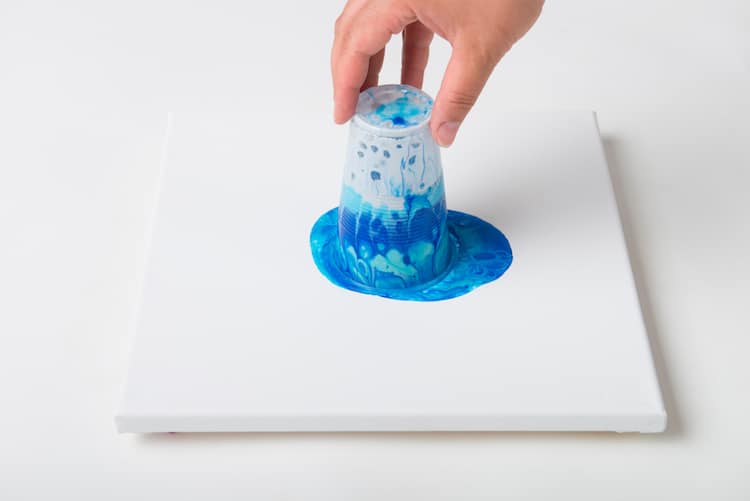
- Flip Cup
This technique is the same as the Dirty pour, the main difference is that the container needs to be on the surface. This way the layers are on top of each other.
Mix each colour separately with the pouring medium and water. Ratio: 1:1:<1.
(You can also add a couple of silicone oil drops to help cell formation.)
The colour mixtures are layered on top of each other. The surface is placed on top of the cup then flipped over whilst holding onto the cup. Carefully lift up the container and let the paint out. Move the surface back and forth, or use a hot air dryer to spread the paint mixture.

- Bottle Bottom Puddle Pour / Flower Pour
In this technique, the colour is applied to the painting surface via the base of a plastic bottle. The raised area creates a pattern that resembles a flower.
Mix each colour together with the pouring medium and water in individual cups. (No need to add silicone for this technique.)
Take a plastic bottle and cut the bottom off. It’s essential that the surface and the bottle are both level, otherwise the pattern won’t show.
Place the bottom of the bottle on the canvas and start pouring small amounts of each colour one after the other onto the bottle. The colours run over the gaps and create a flower-like pattern.
If you like the result, remove the bottle carefully.

- Tree Ring / Swirl
Swirl Pouring is a technique where the paint is applied to the surface with circular movements, creating a pattern that’s similar to the annual rings of a tree.
Mix each colour separately with the pouring medium and water. Ratio: 1:1:<1.
(You can also add a couple of silicone oil drops to help cell formation.)
Each colour is then stacked on top of the other in a container.
The mixture is poured really slowly onto the surface with very small circular movements.
Then, the surface is tilted back and forth until the pattern is achieved.

- Wing Pour
The wing pour is a modified version of the Swirl Pour, where the aim is to get two mirrored wings.
Mix each colour separately with the pouring medium and water. Ratio: 1:1:<1.
Then, start filling the cup with each colour. First the one you’d like to appear between the wings. Then pour the second colour to one side of the cup; this will be the colour on the inside of the wings. Next, you want to choose a contrasting colour and pour it in a circle on the previous ones, in a way that the colour is only at the edge of the cup.
You can add another colour as in step three, that will be visible on the outside of the wings. If you do this you got to add some of the first colour again.
Raise the canvas a little on the side closest to you and pour the paint in the middle in an even, constant stream onto the surface. This will cause the paint to slide away from you, forming a long wing shape. You can also start moving the cup in your direction all the way to the edge of the surface to separate the two wings.

- Swipe
This technique can be used alone or with other pouring technique. It’s used to make visible cells or to achieve flowing patterns.
Apply your colours (mixed with silicone) to the surface with a Puddle or Flip Cup pour. In addition, apply a new colour without silicone. With a tool (painting knife, spatula, moist paper towel or sponge) the individual colour is dragged over the previous layers. The cells should start to form at this point.

- AirSwipe
The Air Swipe technique is similar to the Swipe technique, except the paint is applied with air instead of hand tools.
Mix your colours with the pouring medium and silicone in a separate cups. Then do a Flip Cup Pour. Leave the cup for a bit so the colours can settle. Get a negative colour (without silicone) and pour it around the cup. Distribute it evenly all over the surface, then lift up the cup. Once the cup is empty and the paint is covering the surface evenly, you can start moving the paint with a hairdryer.

- String
This technique isn’t really a pouring technique as such, but it’s used regularly in combination with pouring techniques.
Mix each colour separately with the pouring medium and water. Ratio: 1:1:<1.
Before layering the paint, put some 20 to 30 cm long pieces of sisal cord in a container. Pour the colour mixtures into the cup. Alternatively, you can mix the colour first in individual cups and put the thread in separately, which makes it possible for you to decide where to place each colour on the surface.
Pour the mixture onto your surface. This way the threads, full of paint, are draped on the surface in a way that they wiggle back and forth. At the end you can pull the threads over the surface. The movement of the threads will create interesting patterns.
References
- https://www.goldenpaints.com/products/medium-gels-pastes/special-purpose-mediums
- https://acrylgiessen.com/en/acrylic-pouring-techniques-learn-how-to-fluid-paint/
- https://www.justpaint.org/understanding-the-techniques-of-pouring-acrylics/
- https://www.youtube.com/watch?v=55C-SgnVmwM
- https://www.youtube.com/watch?v=JVHibna9Tss
- https://feltmagnet.com/painting/How-to-Do-a-Pour-Painting