Cyanotype


Cyanotype Printing Process
Cyanotype is a photographic printing process that creates cyan-blue coloured prints. This technique was primarily used by engineers to produce inexpensive copies of drawings, up until the 20th century. Their contemporary use is mostly for artistic value or craft purposes.
History
The cyanotype process was discovered by English scientist and astronomer Sir John Herschel in 1842. He developed the process primarily to reproduce notes and diagrams, similarly how it was later used by architects and engineers.
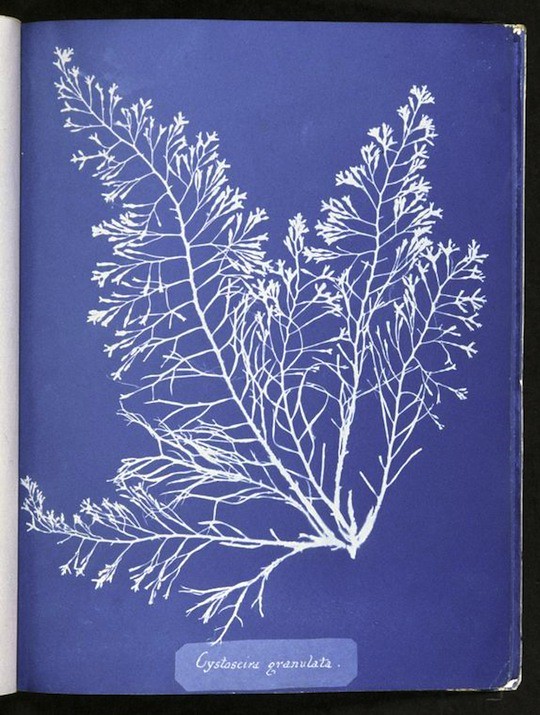
It was Anna Atkins, English botanist who first started using cyanotype process for photographic purposes, and sometimes she is claimed to be the first female photographer. She created a series of cyanotype books documenting plants, ferns and seaweed mostly.
Materials
- 25 grams of Ferric ammonium citrate (green)
- 10 grams of Potassium ferricyanide
- Water (distilled if possible)
- Scale or measuring spoons
- Measuring jug
- 3 glass containers for mixing ingredients
- Plastic spoons
- Face mask (DIY style)
- Goggles
- Rubber gloves
- Apron or old shirt
- Newspaper to cover work surface
- Cleaning cloth
- Brushes or coating rod
- Clothes pegs (plastic)
- Washing line or rope (plastic)
- Art paper ( heavyweight watercolour or printmaking papers is highly recommended) or fabric for coating
- Glass or a contact print frame
- Sunshine or a UV light source
Method
Mixing the chemicals
You will need two types of chemicals for this process, Ammonium ferric citrate and Potassium ferricyanide. They usually come in powder form, unless you buy premixed solutions in cyanotype kits.
First you need to make two separate solutions and mix the two together in a third container.
This recipe is for 50 8×10 ich prints.
Solution A: 25 grams Ferric ammonium citrate (green) and 100 ml. water.
Solution B: 10 grams Potassium ferricyanide and 100 ml. water.
Dissolve the chemicals in water to make the solutions. It’s advised to prepare both in a brown bottle as the solutions will be sensitive to light. You can keep the leftover solutions away from light but they won’t last very long. Make sure to dispose of the chemicals correctly!
It’s important to note that the mixture can stain clothing and skin, therefore it’s a good idea to cover your work surface and to use rubber gloves and other protection. Make sure to work in an area that’s not lit by UV or sunlight, as that will affect the solution and the prints too. Coloured lights are the best.
Prepare the solutions and the surface you will be using.
For best coverage, it’s recommended to use foam brushes.
It’s enough to coat your surface once, as any drips or gaps will be visible. Leave the paper to dry in an unlit area.
To print a cyanotype, you will need to place your object (to make a photogram) or negative ( to reproduce the photograph) on the surface. Photograms work the best if the object is flat, but you can experiment with lots of things for different results.
Place the glass on top, and expose it to UV light. The exposure time varies a lot depending on the light source and season.
To process the print, after it’s been exposed you will need to rinse it in cold water. It’s best to rinse it in running water until all the chemicals are removed – and the print turns deep blue. You can also put it in a Hydrogen peroxide solution to secure the print and avoid fading.
More examples:
Combine this technique with pressed flowers,
Try different shapes,
Or make artist books with our guide.
References & Recommendations:
- https://jacquardproducts.com/cyanotype-pretreated-fabric-sheets.html
- https://londonflowerschool.com/journal/cyanotype-printing
- http://www.alternativephotography.com/cyanotype-classic-process/
- https://www.christopherjames-studio.com/materials/The%20Book%20of%20Alt%20Photo%20Processes/SAMPLE%20CHAPTERS/CyanotypeProcessSm.pdf


